Sunday, May 4, 2014

How to Use Cardboard As Mulch

I can't remember where I first heard of using corrugated cardboard as mulch in the garden. But I've done it a few times now, and I'm definitely a believer. It's a stone-cold weed stopper, it will keep the soil beneath it moist, it will slowly decompose to add organic material to the soil, and it's usually obtainable for free. I've also discovered that earthworms love cardboard, and my goal in life is to make earthworms happy.

The only potential negative in my opinion is that cardboard, in itself, will not add nutrients to your soil. And it's very high in carbon ("brown" decomposable stuff), which means microorganisms need lots of nitrogen ("green" decomposable stuff) from elsewhere to break it down. That's why the key to using cardboard as mulch is to put good nutrient-rich, nitrogen-rich stuff (like finished compost) beneath it. In other words, lock in the plant food underneath and let cardboard just be an awesome barrier.

So if you're still with me, here is an easy step-by-step guide.

1) Collect your cardboard. Our cardboard is mainly old guitar boxes from a music store and furniture boxes. The picture above is our current collection after we removed all staples and tape. You'll want to do that unless you want rusty metal and plastic in your garden beds.

2) Prepare the ground where the cardboard will go. We weeded the bed you see below and added an inch or two of finished compost to the surface. Many people wouldn't even bother to weed first, since the cardboard will smother everything, but I was afraid of some stout weed lifting up the cardboard.


3) Cut the cardboard to fit the planting bed. In this picture, we have placed the cardboard around two rose bushes in a half-circle-shaped bed. Overlap joining pieces by at least a couple of inches to keep weeds from popping up through the seams. Corrugated cardboard is thick enough that you don't need to multi-layer in general.

4) Spread a prettier mulch on top of the cardboard. We used a few inches of shredded pine bark. Then we enlisted the help of our farm's volunteer firefighter to "put out the fire" around the roses. If you're putting down your cardboard mulch in a dry period, water the bed first. In our case, the soil was already moist. Spraying down the mulch keeps it from blowing away. You don't want a gust of wind to catch an edge of a cardboard sheet and turn it over. 

There you have it. An old rusty gate for the roses to climb on comes free of charge. I doubt we will have to weed this bed at all this year.

Friday, May 2, 2014

Garden Update

Well, we are planning to give the blog another shot this year. Getting the garden mostly planted seems like a good place to start. So here it is. 


Seven 4' x 12' raised beds, each one "double dug" with loving care. You can see the tepees we built for the climbing vines out of saplings from the surrounding woods. To me, the soil and the "infrastructure" is almost more fun than the plants themselves.

More updates soon on other projects we have going on around here.

Wednesday, June 26, 2013

Pickin' and Grinnin'

We've been too busy working in the garden to do any blogging. We've already had our main harvests of broccoli and cabbage. The cucumbers are coming in about a dozen a day right now. The tomatoes are just starting to ripen. The bell pepper plants are taking off now that it's good and hot. The eggplant are forming fruits, despite all the damage to their leaves from flea beetles this spring. I'm hoping they'll continue to recover. The zucchini are trying to take over the whole garden and have lots of flowers. The okra plants are about thigh high and looking good.

The cabbages had caterpillar damage but only to the outer leaves. Those are the first roma tomatoes of summer. 
We got our canning supplies this week, and we'll probably start pickling some cucumbers this week. More pictures and updates soon.

Friday, May 31, 2013

Sunrise or Sunset?

Are you a sunrise or a sunset person?


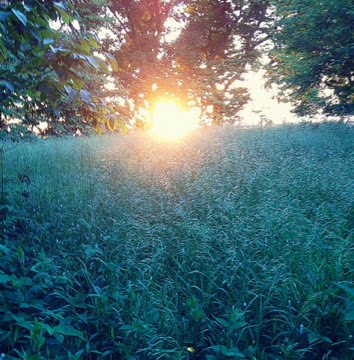
I've been asked this question a few times recently, and I've concluded that I'm definitely a sunset person. I love how the sun hits the trees and grass at the end of the day. That green glow always makes me pause.  


I have a designated spot on the farm that I encourage others to come to and watch the sunset with me. We've named it the "Sunset Tree" because it's a large tree on the western fence line, overlooking our neighbor's hundred acre pasture, with branches that are so long and low that it creates a thick canopy.  And when the sun is setting, it just beckons you to come sit under it and watch the show. I love it and hope to create more of a sitting area there, with a swing and chairs. Maybe a table, too.

I love spots that are made for taking things in. It's sort of my thing.

Friday, May 3, 2013

Hay!


This was a couple of months ago, but I just love this picture, so I had to add it. We got a round bale of hay for free from a cattle farming neighbor. We were looking for old hay for garden mulch, and he said he had one we could take because it wasn't feed quality. He even loaded it into our truck for us with his tractor. When we got home, the bale was wedged so tight into the bed, David had to pick it apart a bit before he managed to shove it out.

Sunday, April 28, 2013

Let's Get This Thing Started: Vegetable Garden

We moved onto this 40-acre property in the foothills of Tennessee in October 2012 and then spent the first few months just getting to know the place. Even in the fall, the vegetation was so thick that we couldn't see very far in any direction. It wasn't until the dead of winter that we got a good feel for the contours of the land, potential lines of sight, and the distances between points around the property.

As we got the lay of the land, we were beginning to plan our vegetable garden for the spring. Here's how we broke it down:

1) Pick a good spot. We decided on a patch of ground that seemed to be the best combination of three factors: sunny, close to the house, and relatively flat. The spot we picked isn't perfect in any of those categories. It was a briar patch surrounded by trees that steal at least a few of hours of sunlight. (One of our goals was to not have to cut any big trees for the garden.) It's also about a hundred paces up a slight hill from the house. As for flatness, it's about as good as you'll find around here unless you're on top of a ridge, which would be even further from the house.

2) Clear the land.

Dave and Gabe burning briars to clear land for the garden.
Like much of our property, this patch of ground had once been cow pasture. But the previous owners didn't have livestock, so they let the blackberries take over. Since we were doing this sans tractor, we spent several days clearing the briars with a sling blade. A kind neighbor, when he heard what we were doing, brought over his tractor and bush hog to help speed up the process.

3) Break the ground.

Rotary tiller in action.
We rented a rotary tiller and spent two days turning the ground over, plowing under the grass, and pulling out rocks. And good Lord at the rocks! We are native Floridians and not accustomed to such geological features. We plan to practice the "no till" gardening method (more on that later) once our raised beds are fully up and running, but it's definitely a good thing we had engine-power starting out.

4) Lay out the beds. We decided to garden in raised beds. Our beds are 12 feet long by 4 feet wide, separated by paths that are 3 feet wide. We tested out these dimensions to make sure Katie could comfortably reach the middle of the bed from the path. The goal is to never need to step into the bed and compact the soil. We used rotting logs and fallen limbs to line the beds and keep the soil from spilling into the paths.

5) Improve the soil.

Mmm. A load of horse manure from a local boarding stable.
Dig a trench across the bed, remove all the rocks,
toss in manure, fill the trench with soil from the next trench.  Repeat.

Once we had our beds staked out, we began a double dig of each bed. Through the double dig we discovered and removed hundreds and hundreds of more rocks. And we dug in a layer of composted horse and cow manure about a foot below the surface. We started a compost pile back when we moved in, but we were saving the compost for later for top dressing around the plants.

So that's basically how we turned a blackberry patch into a series of raised beds ready for vegetable planting. Later on, we'll fill you in on the planting and on other little projects going on around here. Thanks for stopping by!